Getting Started
Last updated August 22, 2024
Cahier is a powerful research tool that enables you to manage documents, collect highlights and write research notes.
This guide will walk you through the basic features of the software. You will learn how to create a reference with a PDF attachment, highlight a passage and extract it to your first research note.
Step 1: Create a Reference
A reference is the bibliographic record of a source in your study. You can create references for books, articles and web pages. They represent the materials from where you gather information and insights about your subject. When you begin a new study, you will add several references to Cahier.
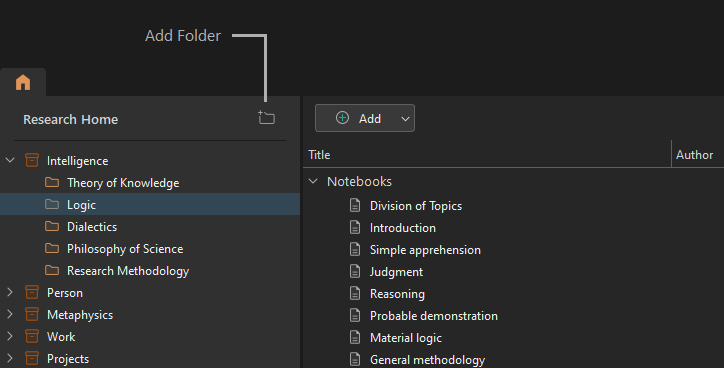
To create a reference, first create a Folder:
- On the Home tab, click Add Folder.
This will make an empty folder appear to the right. Then to create a book, simply click Add > Book.
Documents represent the bibliographical data associated with that particular document type, but you can also attach files to them. So now attach a PDF file to your book:
- Select the book just created.
- In the Properties sidebar, click Attach File.
- Choose a PDF file and click OK.
Now you are ready to start reading and annotating the book.
Step 2: Read and Highlight
Before opening the PDF reader, you will first create a Notebook. The Notebook is a text document that provides formatting and referencing capabilities. Because of that, it allows you to combine references to sources and original writing in the same page. It works as if you were writing on a paper with excerpts from your readings at hand.
To create your Notebook, click Add > Notebook. It is useful to create a Notebook that reflects one subdivision of your study topic. If you were studying the Middle Ages, you could name the page as The Crisis of the 14th Century.
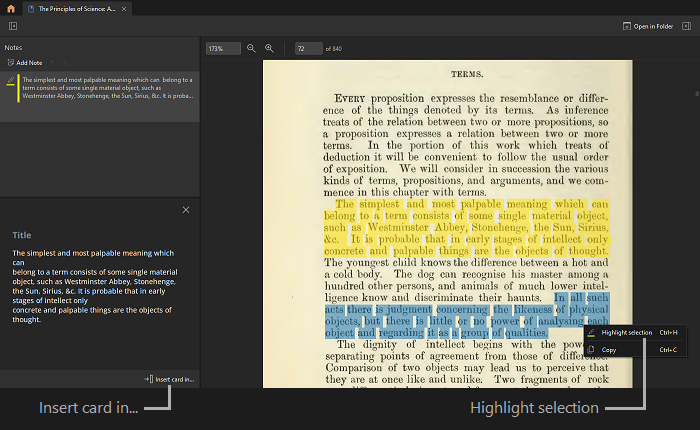
Now to start reading, double click on the book you created in the previous step. This will open the PDF Reader tab, where you will do all your reading. To highlight an important passage:
- Select the text.
- Right click on the text, and then click Highlight selection.
Every highlight can be added as a card in a Notebook:
- Click Insert card in... or right click on a highlight and click Card > Insert card in....
- Select the Notebook you created.
- Click OK.
When you add a highlight to a Notebook, you are expanding your research. This gives you the material you need to reach more solid knowledge.
Step 3: Analyze
You should balance your time between collecting highlights and thinking about your conclusions. Writing in the Notebook is a good method to reflect on the passages you collect.
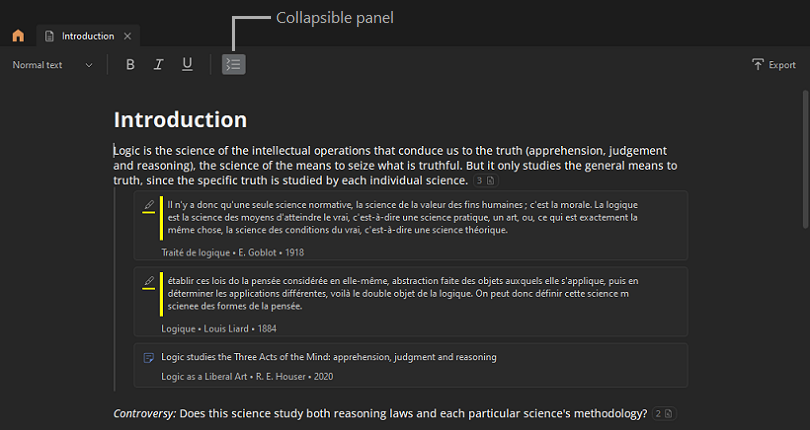
To start writing, go back to the Home tab and double click on the Notebook. This will open a new tab with the Notebook and the highlights you colleted.
When you collect many highlights, use features such as the Collapsible Panels to better organize the content of your document. Highlight cards can also be dragged to change their position on the page.
Summary
You have learned how to create documents, highlight passages using the PDF reader and use Notebooks. We hope this will help you in researching and learning better than ever.
Still missing some information? Contact support.